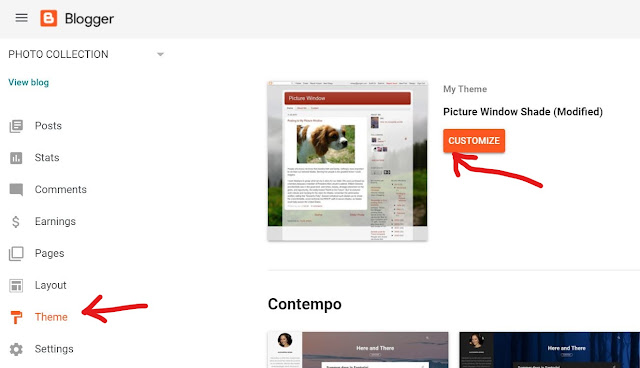
You can set the photo size to small, medium, large, x-large, or to its original size. You can also set the justification to left, center, or right. I recommend centering your photos and using the x-large setting (if you don’t use the trick below) so your photos can be seen in all their glory. The only draw back to using this option is that the x-large size sizes images to 640px, which means if you have a post area that is wider than 640px, the photo will still look a little small. That is where my fancy little trick comes into play, so let’s get to it!

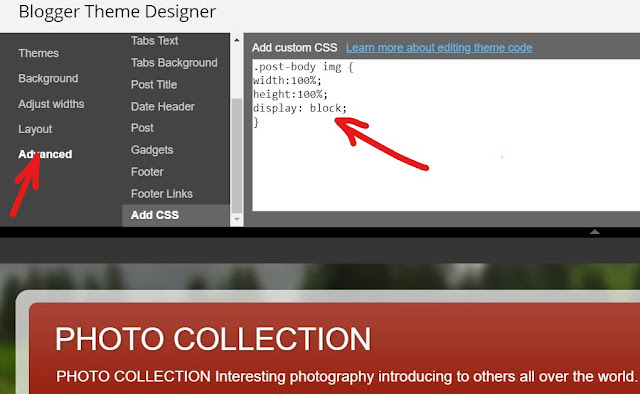
Click “Advanced” and then scroll down and click on “Add CSS” and copy/paste the following code into the white box:
It should look like this:

Note: the above code will only change the images you have set to “Original Size.” If you want ALL of your images to be sized to the full post width regardless of the Blogger re-sizing options you have them set to, add this CSS instead:
Now click “Apply to Blog” to save your changes.
Most blogs have a post area width somewhere between 600px-750px, so sizing your photos to 800px wide should work well on most blogs. You'll want your image to be sized a little larger than your post width with this tutorial because it's easier to bring an image down in size than it is to bring a small image up in size. Hope you may got the image resizing technique.


No comments:
Post a Comment
Thanks for your valuable comments and keeping touch sharing our posts from my PHOTO COLLECTION.